
|
Welcome to Kate's Math Lessons!My mission is to make life easier for secondary math teachers.
|
|
If you like self-grading math activities, you won't want to miss this new digital tool created by Teachers Pay Teachers. Check out the short video below to learn more: Here's what I really like about Easel assessments:
Want to try it for yourself? Check out my sample Easel Assessment here. You can see what it looks like as a student or a teacher.
What do you think? Is this type of self-checking activity something you'd use in your math classroom? Do you want to learn how to make your own or could you use some that are ready to go? Let me know in the comments below or click on the Contact button at the top to send me an email!
1 Comment
I was creating an Algebra 2 activity the other day in Google Sheets and realized there's no built-in editor to add subscript or superscripts. What's a math teacher to do? I could have gotten around this problem by inserting the problems as images (like I did in this digital exponents activity). But I did a little searching online and figured out that you can use Unicode Symbols or the CHAR function to create superscripts and subscripts (sounds complicated, but not as bad as you think). SPOILER ALERT: I made a handy template you can have and all you need to do now is copy and paste! Make sure to grab it below. Here's a quick snapshot of the activity I came up with (see the full logarithm activity). Instead of having to add each logarithm as an image, I used Unicode symbols to create the subscripts so I could type in each problem. 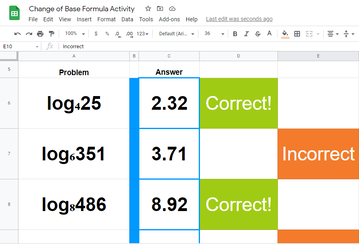 To make it even easier for other teachers, I created a free template you can grab and just copy and paste when you need a subscript or superscript. If you want to be extra fancy and use something that's not listed, you can go to compart.com and search for what you need.  Want to learn more about creating self-checking, digital math activities? Check out the blog posts below: How to Create a Self-Grading Activity in Google Forms How to Make and Edit Math Activities in Google Sheets How to Make Interactive, Self-Grading Boom Cards Short on time? Check out my ready-made activities! You can search for a specific math topic or save money by grabbing a bundle of digital math activities.
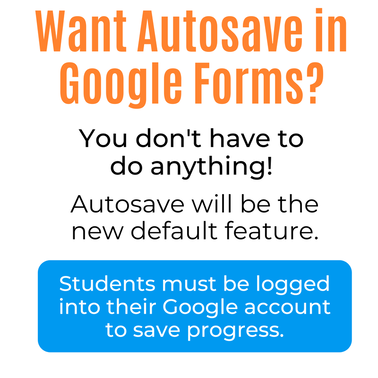
Want to learn how to make your own digital, self-grading activities? Check out this free digital training for teachers! You'll learn how to make self-checking activities your students will LOVE and you'll be proud to show off (and even sell if you want to!).  One of my goals with Kate's Math Lessons is to create activities that will SAVE TIME for teachers. I love to make self-grading math activities because I know students love getting instant feedback and because teachers don't have to spend time grading them. I love using Google Forms to create digital math activities because they're easy for teachers to edit if needed and so easy to assign. I also love that Google does all the grading for you! Make sure to check out the links below if you're new to using Google Forms. How to Create a Self-Grading Math Activity How to Edit and Assign Google Forms in Your Math Classroom Test Out a Free Google Forms Activity New Autosave Feature in Google Forms
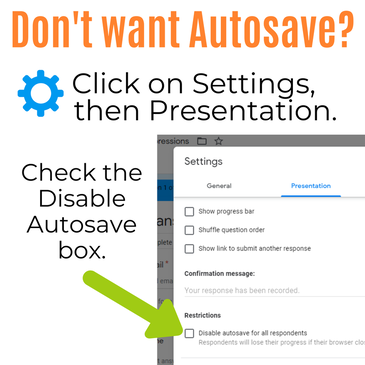
Another bonus: You don't need to do anything to start using this new feature. The new Autosave feature should now be on by default for some Google Workspace domains and will be on by default for all domains by September 15th. In order to save their progress, just make sure students are logged into their Google account before they begin working. How to Turn Off Autosave in Google FormsThere may be some situations where you don't want students to be able to use the Autosave feature. For example, if you need students to complete the activity by the end of a class period so they can't look up answers after class.
Looking for a ready-to-go set of Google Forms you can use in your math classroom this year? Check out the digital activities below!
Want to learn how to make your own self-grading, digital activities? Check out this free digital training for teachers! You'll learn how to make a self-checking activity your students will LOVE and you'll be proud to show off (and even sell if you want to!).  

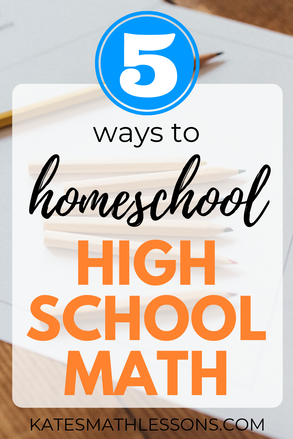
Can you homeschool upper-level math if you're not a math expert? If your math skills are a little rusty and you're feeling unsure about homeschooling when your kids get to high school, this post is for you!
As an experienced teacher with a degree in mathematics, I obviously love math, but I completely understand that it's not everyone's favorite subject! Math can be intimidating, but it doesn't need to be.
Sarah from Homegrown Scholars describes math as "The Nellie Olson to my Laura Ingles." If she can homeschool math, so can you! Here are my top 5 tips to help you homeschool high school math:
1) Find an Online High School Math Curriculum
Even if you're great at teaching math, it's ok to outsource it! Amy from Rock Your Homeschool is a self-described math nerd (she took Calculus 3 in college for fun!) and has learned some important lessons over her past 9 years of homeschooling: "One of those lessons is that it is that it's totally okay to outsource certain subjects. You don't have to do it all, especially when you're trying to homeschool multiple ages!"
I love what Sarah from Techie Homeschool Mom had to say about this: "Teaching math in your homeschool (especially for high school levels) doesn't have to be scary! Outsourcing to online learning is a great option, and has many advantages over traditional book learning. Online courses are usually taught by experienced teachers, teaching what they know and love. Most lessons are self-paced, meaning your kids can learn on their own schedule and work to mastery. And, instead of taking on all the responsibilities as "teacher", you are more free to come alongside your kids as their guide. Online learning isn't going anywhere, and as your homeschooler takes online classes, they are learning HOW to learn online which is a skill they will need throughout their life." There are so many advantages to an online math curriculum, but there are so many to choose from. You'll want to do your research and decide which one best meets your needs. Here are a few helpful reviews of resources to help you get started:
2) Find Ways to Supplement Your Math Curriculum
I've lost track of the number of different textbooks and online resources I've used over my teaching career, but I can say that I've had to supplement each one. It's rare to find a one-size-fits-all curriculum that's going to be exactly what you need.
Amanda from Wander Homeschooling recommends using your curriculum as a guide and to tweak when needed. I also liked her advice to take breaks and cut lessons in half when your child is feeling overwhelmed. Flexibility and the ability to supplement the material are just a few great things about homeschooling! Fortunately, there are a lot of high-quality resources available to help fill in the gaps and enrich the curriculum that you decide to use. Here are a few favorites: Kate's Math Lessons: A website with a wide variety of online math lessons with examples, practice quizzes, and activities. If your child prefers video, you'll want to check out my math video courses. I'm unable to keep up with requests for private tutoring these days, so this is my next best thing if your student needs extra help! For those of you wrapping up Algebra 1 or getting ready to start Algebra 2, don't miss this Algebra 1 Review Course. 
Xtra Math: This website is great for remediation if your child needs to work on their foundation of basic math skills to make high school math easier. Mary Wilson recommends extending the time limit as the teacher and types the answers for her kids so they can focus on just yelling out the facts. You'll want to check out Mary's Math Fact Practice List for more great ideas to help your student review their math facts without flashcards. IXL: I've used this website for years with students and love the instant feedback they get as they practice. It has practice problems from Pre-K to Calculus. 3) Keep a Math Notebook
Even if you decide to use an online curriculum, it's still important for your child to take written notes. The physical act of writing helps our brains remember information and written notes are so helpful for students to refer back to as they work.
4) Don't Forget the Basics
Della from The Beauty of Play says, "We tend to think that older children don't need to use them, but I find manipulatives, especially when we hit factoring polynomials to be highly useful."
Manipulatives are not just for elementary. They're especially helpful in Geometry to help students visualize surface area and volume. Here are a few of my favorite manipulatives for middle and high school math: Fraction Tiles - Students are going to be working with fractions all throughout high school math. These are great even to just have out as a visual reminder. Folding Geometric Shapes - The key to these is the removable folding exterior! Incredibly helpful when teaching surface area of prisms and cylinders. AngLegs and Protractor Kit - These movable pieces are great when learning about angles in Geometry. Hands-On Equations - I LOVE Hands-On Equations. This is an incredible way to help students physically represent linear equations with game pieces.
5) Play Dumb Even if You Know the Answer
If you know the answer to your child's math question, pretend you don't! Make them tell you what they already know about the topic and push them to figure out how their problem is different from one they know how to do. A huge part of your job as your child's teacher is to help them become an independent learner. Teaching is not about the ability to spout off the correct answer when asked. Give your children tools and strategies they can use when they don't know an answer.
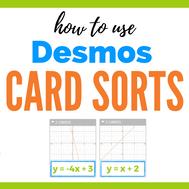
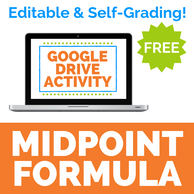
If you're feeling frustrated with homeschooling high school math, Bekki from A Better Way to Homeschool has a great free printable reminder list to help you stay focused on the heart of homeschooling. Don't lose sight of the reasons you chose homeschooling when you get to the hard subjects and reach out for help when you need it. I hope these ideas will be helpful for you! What other ideas or tips do you have for homeschooling high school math? I'd love to know! Let me know your thoughts in the comments below. Thank you to those of you who were able to join the webinar on resources for teaching math remotely! The presentation part of the webinar is now posted below for those of you who missed it. Links and free products mentioned in the webinar are posted below, as well as a few additional resources I think you might also be interested in. Remote Math Instruction Ideas1) Kate's Math Lessons: Free math lessons with videos and practice quizzes. There is a wide variety of free Pre-Algebra, Algebra 1, Algebra 2, and Geometry lessons available for you to use with your students. Many have accompanying digital activities to use that are graded automatically.  2) EdPuzzle: Make a video interactive by adding in your own questions or notes. This is a great way to add in pauses to a video where students have to stop and answer questions before continuing. Their Getting Started page has lots of helpful information if you want to learn more about using existing EdPuzzles or making your own. They have an entire library you can search to see exactly how to create and assign video lessons, see student reports, export grades, and more. Their free version allows you to store up to 20 videos in your account. If you refer another teacher, they increase the number of videos you can store. There's also a Pro version available for schools to purchase that includes unlimited uploads. Digital Math Activities for Distance Learning1) Google Forms: You can turn a Google Form into a quiz that's graded automatically! You can use this Free Activity for Google Drive that I've created as a template and edit to fit your needs. Or read How to Create Self-Grading Quizzes with Google Drive for step-by-step directions on making your own. 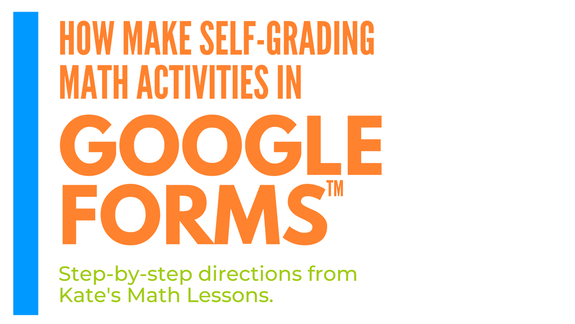 2) Google Sheets: You can also turn a spreadsheet into a self-checking activity! Check out this free digital math activity to see how it works. Students get instant feedback as they type in their answers. You can also learn how to make your own math activities in Google Sheets. 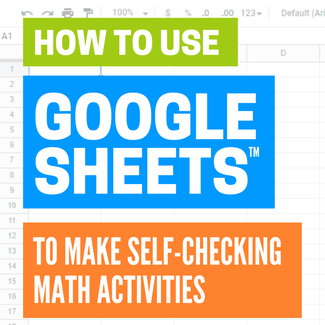 3) Go Formative: You can use this website to turn a paper worksheet into a digital activity. You can upload a worksheet from your computer or take a picture and upload as an image, then add interactive questions! There's also a great "Show Your Work" option, which inserts a whiteboard for students to draw on or they can upload a picture of their work. Make sure to check out their Quick Start guide if you're new to Go Formative. If you learn best by watching video tutorials, they have helpful videos here. They also have a pretty extensive help center to learn how to Create/Manage Classes, how to Create a Formative, how to Assign a Formative, and more. 4) Boom Cards: Digital, Self-Grading Task Cards. These are my favorite digital math activity because they're so interactive and students love getting instant feedback on their answers. Students are shown one question at a time (one card in the "deck" of Boom Cards) and they get immediate feedback. The program allows them to try again if they get it wrong. Once they've gotten a question correct, the program moves them forward to the next card.  You can search the Boom Learning Store for decks that have already been created or can make your own decks of Boom Cards. The links below are a good place to get started if you're new to Boom Cards: What are Boom Cards? How to Get Started with Boom Cards Helpful Video Tutorials How to Make and Sell Your Own Boom Cards 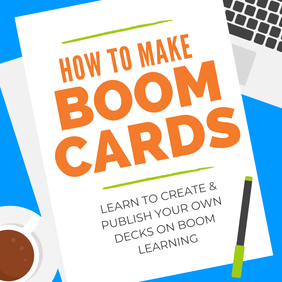 5) Additional Resources Here are a few more resources that I think are also helpful for teaching math remotely. Kahoot: a game-based learning platform that can be used in the classroom or remotely. Here's a helpful article to learn how to use Kahoot in a Google Classroom. Quizziz: Use free existing quizzes or create your own. Flip Grid: Record and share videos to connect with your students. Desmos: Much more than just an online calculator! They have lots of activities you can use remotely with students. Check out how to use a Desmos Card Sorts. Pear Deck: A Google Slides Add-on. Allows you to add interactive questions and formative assessments to your Google Slides. Ready to get started creating your own digital activities? Check out my free training for teachers! You'll learn how to make your own self-checking, digital activity that your students with LOVE and you'll be proud to show off.
If you've downloaded one of my digital math activities made with Google Forms, here are the steps you can take to make changes and send to students. Step 1: Click the activity link in the pdf. When you click on the link, it will ask you to make a copy in your Google Drive. Please note that this is not the link that you will share with students. 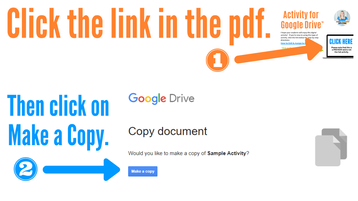 Step 2: Edit questions if desired. You can make any changes to the activity before assigning to students. You can add or delete questions, change the answer type (multiple-choice, short answer, etc.), change the order of the questions, etc. 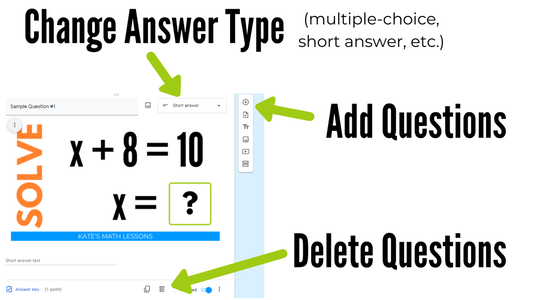 Step 3: Edit automatic grading settings if desired. I set up my activities in Google to be graded automatically! The current settings are to release grades immediately and students will be able to see the point values and correct answers. These settings can easily be changed by clicking on Settings, then on Quizzes. You can change it to allow students to see the results after you’ve manually reviewed them and can also select if you want them to see the correct answers or not. 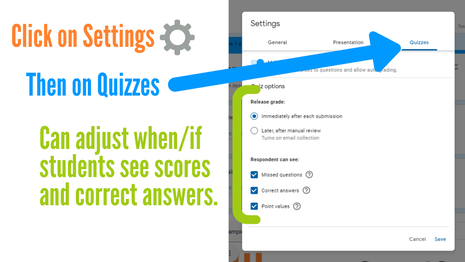 Step 4: Assign to Students Click the SEND button at the top of the form to assign the activity. 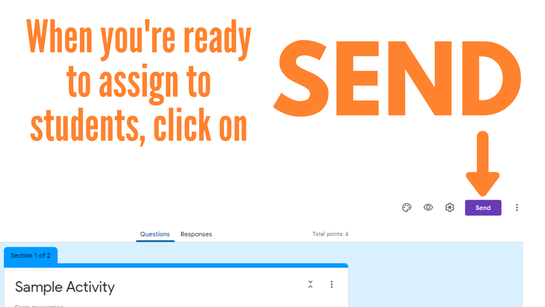 You can enter student email addresses, get a link to share with students, or use an embed code. Note: the link you will share with students is not the same as the link in the pdf. 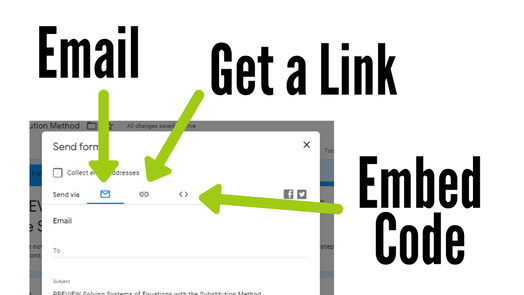 Step 5: See Student Results Students complete the digital activity and hit submit. You can see their answers by clicking on “RESPONSES” at the top of your Google form. 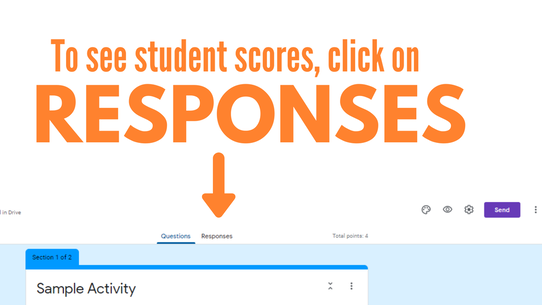 After students have submitted their scores, you can easily see which questions were missed and can create a spreadsheet or download their scores. I hope these activities will be helpful to you! If you're looking for more digital activities for Google, don't forget you can save $$ by buying math activity bundles. As an extra bonus, when I add activities to a bundle that you've purchased, you get them for free!
Want to learn how to make your own digital activities? Check out my free training for teachers! You'll learn how to make your own self-grading, digital activity your students will LOVE and you'll be proud to show off (and sell if you want to). Google Forms™ vs. Google Sheets™
With distance learning, I know many of you have made the switch to using more digital activities this year and I'm guessing you may already know how to make math activities in Google Forms. These are great because Google can grade them for you and it's so easy to see student results (you can try one of my math activities for Google Forms for free to test it out).
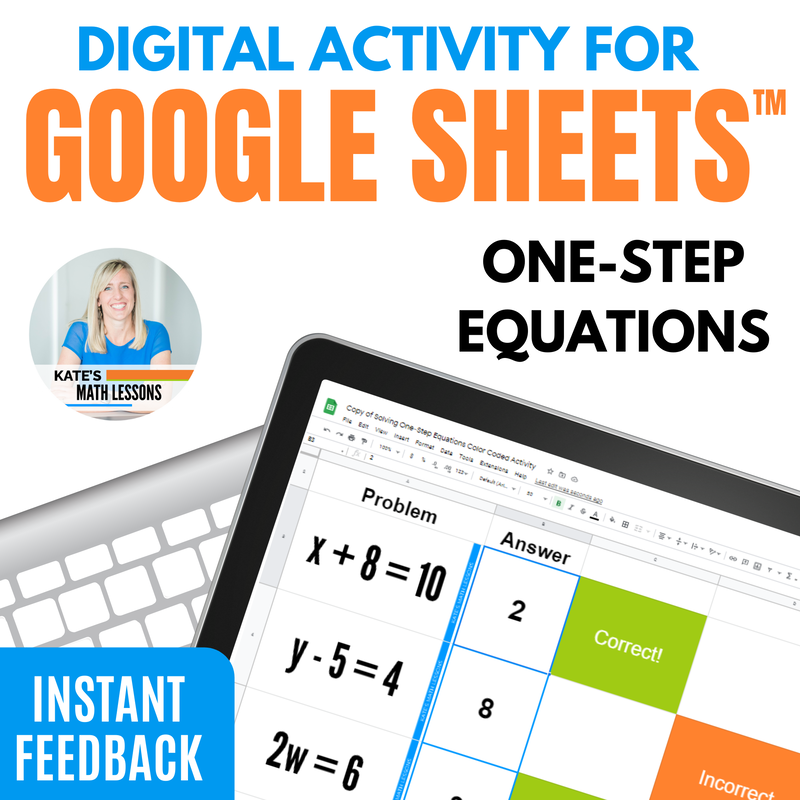
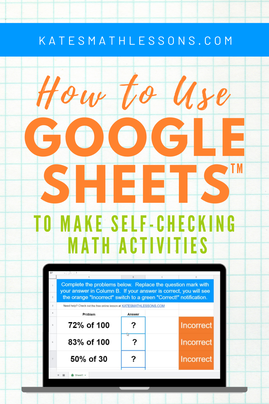
I love using digital activities with Google because they're so easy to assign with just a link and students love the automatic feedback they get. I also love how easy it is to see which questions students are getting wrong as you make remediation plans. Did you know that you can set up activities to be graded automatically in Google Sheets as well? This spreadsheet style of activity can be set up to give students instant feedback on their answers. Students type in their answers and it's set to automatically let students know when their answer is correct. I love how you can quickly glance around the room and see the colors changing on students' screens as they work. 
The great thing about this type of activity is that they're editable! You can type in your own questions or insert a picture and I'll show you how to edit the answer so the color changes automatically. How to Make Your Own Self-Grading Math Activities
Step 1: Copy my template
The easiest way to start making your own is to make a copy of one of mine as a template. Don't worry if it's not the topic you want, I'll show you how to change the questions in the next steps. Click on the picture below to download a free template. 
Step 2: Edit the Questions You can double click on any question and type in your own. You can also insert an image to use as a question, just click on Insert at the top and select Image. You'll likely have to adjust the size of the cells if you choose this option. Note: You should get a "Heads Up! You’re trying to edit part of this sheet that shouldn’t be changed accidentally. Edit anyway?" message when you go to edit. I set up this notification so that students don't accidentally delete the questions as they work on the activity. Step 3: Edit the Answers Start by right-clicking in cell C5 (the first green correct cell). Choose Conditional Formatting. Double click on the right where it says Custom formula is =$B$5=7 This is set up to accept 7 as the correct answer. Delete the number 7 and type in the answer for your new question that you created in cell A5. Then hit Done. Next, click in cell D5. This is the cell that will show up as orange and say Incorrect if the answer is incorrect. Right click and choose Conditional Formatting again. Double click on the right where it says the Custom formula is =$B$5<>7. This is set up to turn the cell orange if the answer is not 7. Delete the 7 and type in the new correct answer. Hit Done when ready. You can also edit the colors of the cells and change the Correct and Incorrect wording if you'd like. Step 4: Assign to Students When you're ready, send to students! See the directions in the free download for more details on this step. How Will You Use These Self-Grading Math Activities?
1) Free Math Lessons, Videos, & Practice Quizzes
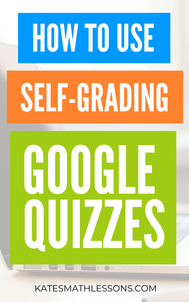
As always, my Pre-Algebra, Algebra 1, Algebra 2, and Geometry online math lessons are all free. The lessons include practice quizzes with instant feedback and helpful videos with examples. Many of the lessons have printable study guides that would be helpful for students going through the lesson on their own at home (grab a free study guide). 2) Self-Checking Google Activities It's easy to make Google quizzes that are graded automatically. They're a great way to assess learning and give feedback while teaching remotely. You can quickly learn how to make your own Google quizzes or try out this free activity for Google drive. 
4) Use Zoom for Online Meetings
Don't have access to Google Hangouts? Zoom is another great option to host an online meeting with your students. Their free plan allows you to have up to 100 people in a meeting at once. Zoom can also record your meetings so you can easily upload the video online for students to access. 5) Kahoot & Quizizz Have you tried making Kahoots? Kahoot is currently offering free premium features for schools facing closures. Students love being able to play live against each other or you can have them complete the quizzes at their own pace. You can also search Quizizz for free gamified quizzes or create your own. 6) Additional Online Tools Many companies are starting to offer discounted or free subscriptions for schools affected by the virus. Stay up to date with more useful online tools by following this Wakelet by Erin Flanagan. Update: Make sure to check out my Tools for Teaching Math at a Distance post for even more resources! 
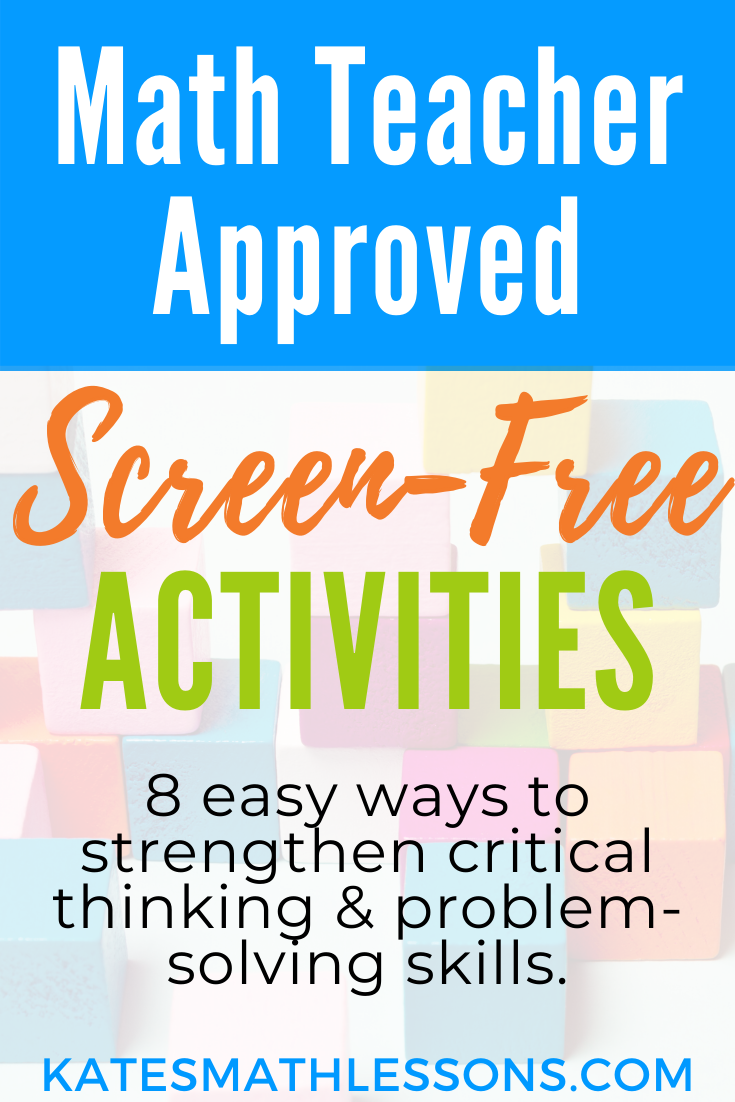
I've rounded up some simple and affordable ideas for teachers and parents to use to encourage logical reasoning skills! They're all quiet activities that are great for students to work on individually at a desk, or parents can throw them in the car, take to a restaurant or even on a plane for some tech-free entertainment.
Here are my favorite screen-free activities (affiliate links included) to strengthen critical thinking and problem-solving skills: Update: I just got these Kakooma cards for my elementary-age daughter to try and she LOVES them! It's a race to see who can be the first to find three numbers that form a sum. This is a great way to help kids master their addition facts and is so much more engaging than traditional flashcards. There are easier problems with 5 numbers to choose from on one side and the harder side has 9 numbers to choose from. There's also a Kakooma Multiplication and Division game that I'm planning to order when my daughter is ready. The size of these cards is nice and compact so it's something easy to take with you in the car or to a restaurant.  1) Puzzle Squares: These were always first to go off the shelf! Students love rearranging the squares to try to get them all to fit together. They are harder than they look! They stack up nicely and easily fit in a ziplock bag.  2) Izzi Cards: These little black and white cards are so fun! You have to arrange them up so the colors match up and see if you can fit them all together. The box comes with enough cards to divide up into multiple ziplock bags so several students can play at their desk at a time or use them all together to make a larger pattern.  3) 24 Game Cards: Kids love this game! If you have not played it, you need to give it a try. You must use all 4 numbers on the card only once and can add, subtract, multiply, or divide to make 24. Such a great way to help improve mental math skills. You can play it individually or as a group and see who can come up with an answer the fastest. I always kept a stack of cards available for my students that wanted to practice - they got pretty competitive! 
4) The Triangle Game: Such a classic. So simple, but kids love it! I keep mine in a ziplock bag for easy transfer and storage.
 5) A Tangram Set: I have a few different tangram sets that I put in ziplock bags. Great for developing spatial awareness and problem solving skills!  6) KenKen and Sudoku Puzzles: Many of my students loved to do KenKen or Sudoku puzzles so I would tear some out of a book to have available or find some free ones online to print. For those of you who haven't tried KenKen puzzles before, they're like sudoku puzzles but use basic math operations (addition, subtraction, multiplication, and division).
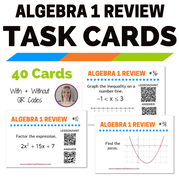
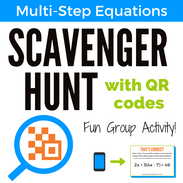
7) Kanoodle: This puzzle kit has 12 different colored pieces that you must fit together to match the diagram. It comes with a little book of 200 different puzzles that start pretty simple but work up to deceptively hard 3-D puzzles! So great for improving critical thinking and problem-solving skills. My first-grader can do the puzzles at the beginning, but the 3-D ones are hard even for me! It comes with a little carrying case that's small and easily fits in my purse. My daughter likes to do these on long car trips.  8) Brain Teasers and Logic Puzzles: I used to have a whole stack of books with fun brain teasers and logic puzzles. I would tear out a few pages and make copies to have available for students. Sarah Carter has a whole slew of free printable ideas over at her blog, Math Equals Love, that you should check out if you need some ideas! I would recommend laminating them so you can reuse them! What about you? Any activities you think I should add to the list? Let me know in the comments! There's no question that cell phones can be a huge distraction for students. It's an issue that's impossible to ignore. Cell phone addiction is a real thing. I've had students who would rather be expelled than be separated from their phones. So what's a teacher to do? Embrace technology and try to have students use them in productive ways? Or find ways to keep phones out of sight? I've found that a combination of both strategies is helpful. Smartphones can be an amazing learning tool, but they can also be extremely distracting. We all know that there are students who will bring their phones to class even if they're banned. So how can teachers use them to enhance learning and also make sure they're put away at the appropriate times? Here are a few ideas: 1) Pocket Points AppHave you heard of this app?? Pocket Points is an amazing way to reward students for staying off their phones in your class. Not an affiliate link, I just really like the app! It's free for teachers and you can set up your own rewards (think extra credit, snack rewards, tardy passes, deadline exemptions, etc.) You can set a goal for how long you want them to be off their phones and the app keeps track of their phone use. Not only can students earn the rewards you set up, but they can also earn local and online deals. They've got free Chic-fil-A sandwiches, discounts at Papa Johns, and more! Using Pocket Points is an easy, non-punitive way to track phone use and reward students for using their phones at appropriate times. 2) Use QR CodesOne easy and fairly low-tech way to use smartphones in a productive way is to use them to scan QR codes! Use a free QR code generator like this one to create your own. You can create QR codes that link to an answer key, an image, a website, and more! All students need to do is download a free QR reader. You can even create scavenger hunts using QR codes. Check out my Algebra 1 Review Task Cards or my Multi-Step Equations Scavenger Hunt with QR codes to see some examples of how you could use QR codes in your math classroom.
|
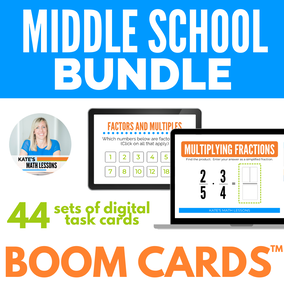


| Boom Cards are digital task cards. Students are shown one question at a time and get instant feedback on their answers! They work best on a larger screen, but cell phones will do if you don't have access to tablets or desktops. Grab a free set of Boom Cards or check out the Top 7 Reasons to Love Boom Cards for more details. | 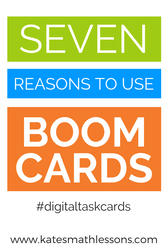 |
6) Create a Cell Phone Hotel
Yes, cell phones can be a great learning tool. But there are times when we just need them to be put away and make sure they don't come back out. Anyone else have students who will write with one hand while secretly texting with the other?! You might consider creating a storage system for cell phones. If you search Pinterest for ideas, you'll find anything from simple pocket charts to expensive lockers with individual keys. I've even seen teachers buy large camera cases to lock all the phones up together during class (Check your school's policy before implementing!).
My current favorite simple solution is to give each student a manila folder with Velcro. Students can keep the phones at their desk (cuts down on the separation anxiety), but it's very obvious if they try to get their phone out. It's an affordable solution that doesn't involve taking phones from students, but makes it easy for teachers to ensure the phones are not being used.
What do you do in your classroom? Do you ban cell phones all together, embrace them, or use a combination of strategies? If you have solutions, I'd love to hear them! Let me know in the comments below.